A great project for any gardener is harvesting seeds from the curent year's crop and stashing them away until the following spring. Today, I'm sharing how I harvest and save pumpkin and squash seeds, sunflower seeds, beans and corn kernels. I also harvest oriental poppy seeds and echinacea seeds. However, that's for another post. It can be a bit labour intensive to hand pick all the seeds out, but it is very rewarding to see them germinate and grow all over again. . Below are the steps I follow to harvest the seeds and store them, as well as to check for viability, so that I don't store duds!
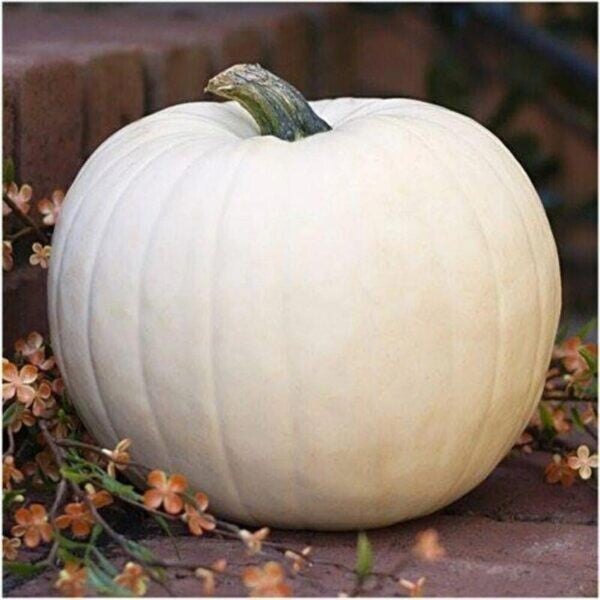
A white pumpkin is a super addition to any harvest or halloween decoration scheme. They are always more expensive than the traditional orange pumpkins, so I will grow my own for next season and sell them at our farmstand. You can use the same technique with all pumpkins. I stored sugar pumpkin seeds as well, in anticipation of pumpkin pie and pumpkin cheesecake next season!!
Steps:
Open the pumpkin and scoop out all the guts. Seperate the seeds from any stringy stuff. Rinse thoroughly under warm water, then pat dry with a towel. Lay out on a parchment lined baking sheet to dry completely ( about 3 days - depending on humidity). Store in a labelled jar* or bag until spring planting time.
Germination time: 5-10 days
I love butternut squash and it's versatility in cooking. From butternut squash soup to butternut squash ravioli with goat cheese and candied pecans, it's a must in any kitchen garden. Sadly, mine did not thrive in this years drought like conditions, so I used a squash from the farm market to harvest my seeds from and will plant them next season.
Steps:
Follow the steps above for pumpkins
Germination time: 5-15 days


Sunflowers are one of my favourite garden additions. I've been planting a row of sunflowers on the north side of my vegetable garden each year and harvesting seeds to plant again the following year. I opt for a mix of giant Tayio sunflowers, which grow up to 10 feet tall and have a 1 foot plus wide bloom, and smaller ones which grow 5-6 feet tall with 6-8 inch blooms.
Steps:
Allow the sunflowers to fully die back on the stalk. If birds are starting to eat the seeds, cover with a thin layer of muslin or cheesecloth. Pick a dry weather stretch to cut the flowers off, leaving about a 12 inch stem. Hang them in a cool, dry place for about a week (you can remove the covering). Carefully, pick out all the seeds and dry further on a parchment lined baking sheet, at room temperature, especially if they are still sticky at all. Store in a jar* or bag until spring.
Germination time: 7-14 days
Corn is another great crop to save seeds from. Each individual corn kernel can become a new corn stalk. I grow a bicolour sweet corn, which is delicious.
Steps:
Allow corn cobs to fully mature and dry on the stalk. During a dry spell, harvest the full cob and leave it in a cool dry space, ensuring adequate ventilation around each cob, until the kernels are shrunken and dried. Remove the husks and silk, then allow to dry another week further at room temperature. Carefully pull off each kernel and store in a jar* or bag.
Germination time: 5-10 days


I grew Contender Bush Beans this summer and got a massive crop. I couldn't keep up and had to blanch and freeze a bunch for use in soups this winter. I am workimg on a university program in horticulture and as part of one course, I have to germiante seeds and grow the plants until they produce seeds them selves, documenting it weekly. They are currently at the 2-inch bean stage. I chose this variety of bean, due to it's fast growth rate and fool-proofness. I will actually have an indoor winter bean crop from my three little plants!!
Steps:
Allow beans to dry on the bush until light brown/beige and papery. Remove them, peel them open and remove all the individual beans inside. Lay them out on a parchment lined tray to dry further, about 5 days, before storing.
Germination time: 3-6 days
VIABILIITY CHECK
To ensure the seeds you harvest will germinate again next year, it's a good idea to do a little viability check for germination. To do this, I place a few random seeds in a damp, not soaking wet, paper towel and fold it over the seeds (For quicker germination, try soaking seeds in room temperature water for 12 hours first). Then place the paper towel wrapped seeds in a mason jar with the lid on and put it in a warm place. If you don't have a jar, you can use a zipper seal baggie. Blow air into it with a straw and seal to create a mini greenhouse effect. If you have a seed germinating heat mat, that's an ideal spot to germinate these seeds and it will speed up the process. Be sure to check them every couple of days to see any signs of germination, reintroduce fresh air and to ensure the seeds and paper towel remain moist. Spritz with a bit of water if they need it. After 5-15 days (depending on seed type- see above) I open the paper towel to check whether I have a sprouting seed. If not, the seeds may not be viable, or need a bit longer. If you notice any growth then your seeds are good to go. Discard any moldy looking seeds.
*PAPER vs. PLASTIC/GLASS
It is preferable to use paper bags to store seeds, as paper allows for better air circulation, prevents mold buildup and absorbs excess moisture. If you want to store in plastic or glass, use oxygen absobers (or grains of rice) and ensure seeds are really dry prior to storing. Personally, I store seeds over the winter in mason jars with an oxygen absorber in each - I just love mason jars! Regardless of which method you use, ensure seeds are stored in a dry, cool and dark envirnment (listed in order of importance). When I sell seeds, they are placed in paper seed envelopes and labelled accordingly.
Add comment
Comments